Showing posts with label for the twins. Show all posts

Tuesday, April 17, 2018

Loads and loads of School Bus Tees plus modifications.


So I will just apologize in advance for this one being a picture heavy, few word post. But that's what happens when I use this as my journal and have a huge backlog. 


The Oliver + S School bus t-shirt is by far my most used pattern, I have made well over 100 at this point. I added it up once a couple years back and I was at like 80... I don't have the patience to go back and count again, ha! So you will just have to trust me.


I paired the tee with the Sew a Little Seam Movie Night Pajama bottoms you can get for free with a code from their facebook group. It does come with a shirt, but I like what I like.


These are also the SALS pj's, they come with a shorts cut line.


My cool friend Courtney is setting up a shop to sell applique patterns, so I volunteered (read: begged) to try a couple out.


I gave this one to my nephew for his birthday, but it was reaaaaally hard.  I need to make one for Sam!


 As the next few photos will show, I clearly have a thing for this very specific colorblock.


Another one for the nephew.


A very long time ago I wrote a post for the O+S blog on how to do a faux sleeve.

Also one on how to add a hood.


And how to use it to make a tank top.


I also used it to make a swim top.  It is such a versatile pattern, I am certain there will be many more made in the coming months.

Skater Dress.


The Kitschy Coo Skater Dress is probably one of my very most used patterns. It's such a classic shape and so easy to wear! It always looks so cute on the girls.


It is also one of the dresses that they consistently pull out of their closet to wear- so it must be good!


It is great to show off a print, and also very easy to customize.


I typically use cotton lycra for it, so many great prints and it can be hard to find great patterns to use cl on since it doesn't drape well, though as kids it doesn't matter as much. for this one I used a double brushed poly and eliminated the waist seam to change it up just a little.


Really though, this is their favorite one.  I think at this point George probably wears it more than Izzy, but she does try to get her turn in it!


This is why they love it so much! I added a full circle skirt.  I really should have added some clear elastic to the waist seam, the skirt is a little heavy. I guess nothing is stopping me from adding it now, ha! Well, other than the fact they search it out and wear it every time it comes out of the dryer.

Saturday, December 16, 2017

Flannel Playtimes.

It's probably time to dust off my sad little corner of the internet, I'm beginning to forget the details of things I've made over the last year.  While I still document all my makes over on instagram, I don't add things like sizes I make and how much length I add for my kids.  This makes my life harder when I go to make something in the next size up, haha.  So here we go, I'm going to attempt to start journaling my makes again. 


And what better way to start than with the Oliver + S Playtime Dress.  I made both girls a size 6 with some length added to the skirt and sleeves.  The skirt is also a little more narrow than per the pattern as I didn't want to have to plaid match two side seams, then since I was making a coordinating set I wanted them to both look the same.  Also, I was worried about the bulk of gathering flannel.


Speaking of flannel, both fabrics are Robert Kaufman flannels.  I really can't say enough good about the RK flannel, it washes up so nicely and continues to look fresh after many, many washes.  It's also super soft.


I chose to line the bodice instead of using the facings.  It really is my preferred method because it's just so fast and I tend not to do the optional topstitching on this dress. 

The fit on them is great, I probably didn't need to add length to the skirt but at the same time I'm wondering if I should have added a smidge more to the arms for longer wear.  I did a narrow hem on the sleeves so there isn't anything I can let out.  The bodice fits well, it isn't restrictive at this point.  This pattern seems to last for a while for these two, they are able to wear them as a tunic once they grow until the bodice is too tight.  In fact, they have had some last two winters. 

Luckily they fit nicely because I have already started on the next two.  A few years back I sewed sequins on the Playtime following the topstitching guide and just loved the result.  I was at Joann's while killing time waiting for Costco to have my photos ready and accidentally decided to replicate the dress, times two.  Because twins.  George and Izzy both added "pridde dress" to their Christmas list and I have a feeling that will fit the bill nicely. 

Monday, May 22, 2017

New swimsuits.


I recently made swimsuits for 4 of my kids, meant to do 5 but the baby's will have to wait, ha!


Abby is at that hard stage, she's very particular on what she likes and what she's willing to wear.  She LOVES rash guards and boy shorts, so I figured this combo was sure to win her over.  She also chose the main fabric, so that didn't hurt either.

For the rashie I used my favorite shirt pattern for her.  I have bought a rashie pattern in the past and realized it was basically a slim tee with a taller neckband.  I usually choose not to do the taller neckband because I don't like the look of the way it flops, but if you want more sun coverage you can just add some height.

The Hey June Camden Raglan was perfect for the task.  I did add a partial lining to the front that goes a little below the armscye, I just layed the wrong side of my main fabric and wrong side of my lining together and treated it as one.  I probably could have figured out a way to add some elastic to the bottom of the lining to keep it down, but for now she didn't seem to mind. She says it's very comfortable and her favorite rashie yet.


The bottoms are the Jalie Swim Shorts.  The pattern has a great value, with 27 sizes included in one pattern.  But  that also came at a price so to speak, there are no layers and at times it was difficult to discern my size line.

Once it was cut, though, it was smooth sailing.  The instructions are well written, very to the point which I really like.  The shorts are lined with a bikini style bottom, again she said she really likes these and would want another pair in the future.


I made this adorable little set with the Boo Designs Swimmers.  This is definitely a favorite swim pattern of mine, I've tried many, many swim patterns and this one gets my highest recommendation.  It's drafted well, instructions are great and it actually tells you to use elastic in the straps and other places it needs it, unlike other patterns.  There are also loads of views included.


For this one, I chose the tankini and boy shorts.  The bottoms come with an optional lining, that I always choose to use because no one wants unsightly camel toe, not even a kid.

The palm fabric from this top, the starfish and sharks (boardshort) below are all from Raspberry Creek Fabric, she just got in to the swim fabric game and I have to say, it exceeded my expectations.  It is nice and thick and as easy as swim knit can be to sew.  My machine hates the shiny swim for whatever reason, ha! I have bought from other custom swim places and the base is thin, this one is nice and thick and so I chose not to line the top even though it is white.


I have been eyeing this Jalie Racerback for quite some time.  Again, it has 27 sizes in one, so fabulous value.  This one at least has the adult and kid sizes separated in to two separate files, which made it a little easier to cut my size, but still no layers.


This pattern did not disappoint, I was very, very happy with my end result!

If you're interested in any Jalie patterns, on their website you can download the instructions and take a peek before you buy a pattern, I thought that was pretty cool.


I actually went out more than once, maybe more than twice (shhhhh!) to try for photos, that's what I get for not wanting to wait for the golden hour.  So the last time we went out (all the photos above) George and Izzy wanted to switch suits, hence the child changing in the suit.

I just love the lines on this suit, It would be adorable in two fabrics to show them off even more.


This pair, I hesitated to include it.  I chose the Gracious Threads Swim and Surf Shorts for my shark obsessed boy.  As it turns out, they ended up too tight because they are drafted for girls.  There was no indication of that on the website or pattern listing, so I was quite disappointed.  The only way I found out was through a post on Facebook where the designer confirmed it.

The pattern itself went together alright.  I really like the way the bias tape is done, it makes it less bulky as it isn't overlapped except for a very small part where you hide the raw edge. I liked the lining, I used regular swim knit instead of lining (I think she mentions to in the pattern, can't remember) because swim lining is very thin and doesn't give any support.  I actually line all my suits with regular swim. I had major problems with the waistband elastic, though.  You're instructed to sew 1/8" from the top, then 1/2" down and 1/2" below that.  I chose to follow the 1/8" but then split the difference in the remaining waistband at 3/4".   I used 1/2" elastic and could barely thread it through, my hands were so sore by the end, ha!

So I grabbed some more of these sharks and the other boardshort print offered by Raspberry Creek and am on the look out for a better boardshort pattern.  Maybe just a regular short with a lining?


This post was written to be a part of the Suit up for Summer Blog Tour, but all opinions are 100% my own and I was going to make them all suits any way, haha! But if you want to check out other posts that review other swim patterns, check out the links below. And rumor has it, the giveaway is pretty rad.

Tuesday, February 21, 2017

Two new outfits.


 Twinsies desperately need some solids in their lives, they love to pair all sorts of patterns and colors.  Typically they have leggings, a skirt, shirt and jacket basically a whole lot going on.  So cue in amazing weather here and it was time to add in some solids.
 

George is wearing a School bus t-shirt in a solid navy cotton lycra and a Sailboat skirt in a joanns bottom weight.  Both size 5.  I can't believe I haven't made this skirt more often, I love it so much on her.

Izzy has a color blocked School bus t-shirt in a cotton lycra and a Butterfly skirt in denim, again both size 5.

This season's Kids Clothes Week theme is capsule wardrobe, so I am for once embracing the theme.  I have a plan sketched out and plan to stick to it, though I can't guarantee there won't be a pretty dress thrown in, too, that wasn't already on the list.

Wednesday, September 21, 2016

Building Block Dress book tour


I was so, so excited when Liesl asked me to join in on her virtual book tour.  From the minute she explained what the book was about and included a little preview, I knew it would be love.  It's no secret I am a huge fan of customizing patterns; in fact check out the tutorial section on the blog, I have written a few posts over there.  I was so excited to learn the correct way to alter patterns, because let's be honest, I was just guessing and hoping it all worked out correctly.


As soon as I opened the first few pages, I was hooked- look at all the eye candy!  The book is beautifully executed and photographed.

There are quite a few pages just of inspiration. I waited until the kids were in bed then pored over every detail slowly and carefully before moving on to the next page, I wanted to take my time and take it all in.


It includes the layout of instructions that we all know and love about Oliver and S.  I love that it was a familiar look, because honestly I was a little nervous at first.


But then I quickly realized, if anyone was going to be able to teach me the correct ways to customize and then sew my customized pattern, it was Liesl.


Each element is broke down in to it's own chapter; sleeves, silhouettes, pockets, collars and necklines, finishes: hems, closures and linings.

There is so much information packed in to this book.  Even if you don't have a little girl to sew for, this book would still be very useful in altering other patterns, I love that I know it will work for me long after the twins outgrow the patterns (hopefully a very long time from now, ha!)


I decided first to sew just the absolute basic dress, no alterations to the pattern.  Well, aside from doing elbow length sleeves, but that is so simple that I hardly can call it an alteration.  I wanted to make sure the fit was what I expected (it was) and that I was familiar with the steps before moving on to more challenging details.

This is the size 5 for reference, I currently make a size 5 for the twins in all my other Oliver and S patterns, also.


Once I had a feel for the pattern and the layout of the book, I moved on.

Normally when I make something, I pick out the pattern and then the fabric.  This time I used the worksheet layout included in the book to really think it through, I picked out my fabrics first and then read through each chapter, picking each element carefully trying to decide which would work best to highlight my fabrics.


Abby is on the high end of the size 12, but as soon as she saw the book she begged for me to make her something, too.  She currently isn't a huge fan of dresses, so she and I chose a sleeveless tunic length, swingy top made from rayon challis.  I followed the instructions on page 82 for an a-line dress but added a bit more width between the slices for even more swing, knowing my rayon challis would lay and hang nicely.

It isn't easy to see in the pictures, but I actually added a half inch to the front center and cut two fronts, sewed together and then topstitched down each side to give it a fun little detail.

I went to page 135 and added a key hole back opening since she isn't generally a fan of button backs, but doesn't mind a single button.


For Elizabeth's dress, I used the basic bodice, collar and the flared gathered a-line skirt found on page 73.  I love the fullness of the skirt and so does she.


For the hem, I used a gorgeous crochet edge bias tape I found on etsy.


I used the bell sleeve found on page 57 and added an elastic casing to the hem, I love the look it gives.

The back is a button down, per the basic building block dress.


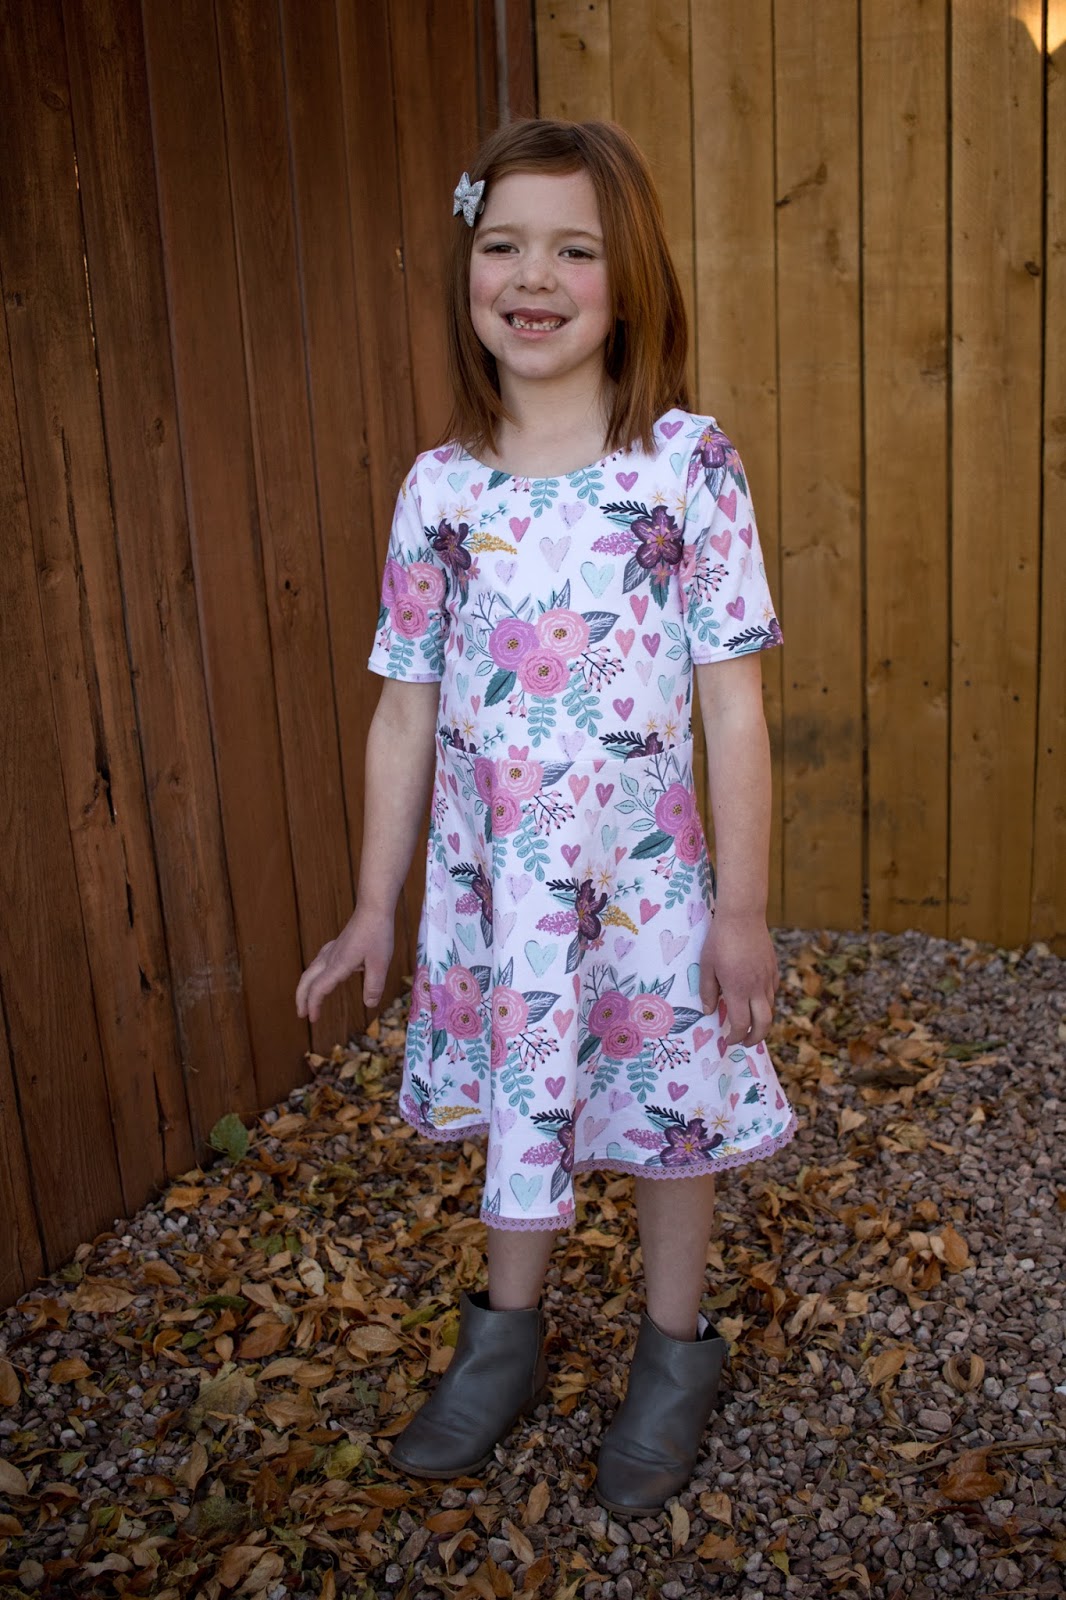
For Georgia's dress I used the empire waist found on page 57 with the flared a-line skit on page 72.

I again used the keyhole opening on the back, found on page 135, and added lace to the hem of the skirt.


I actually really like the bias binding for necklines lately, so that is the method I used for all three makes.

I chose elbow length sleeves for this dress also, I find that my girls like to wear them year round, so I figured I get to use the cute elements like an elastic casing or a sleeve cuff (it's hard to see on this one, but it's there) and they will get loads of use.

I also cut a piece a couple inches wide and added a narrow white bias tape to the edges to tie in the tiny bit of white in the print and the lace on the hem.

So basically to sum this all up, I really, really love this book.  I have a stack of papers already filled out waiting to be sewn in to reality and that is just touching the surface of the possibility that comes from the book.  The book is so well written, not that I would expect anything less from Liesl and O+S, but I feel it will become a very valuable tool in any sewing library whether you sew for a little girl or yourself.