Monday, March 11, 2013

The perfect canvas.

The Oliver + S Roller skate really does make the perfect canvas, don't you agree?


 This dress was nearly completely designed by little miss.  I chose the applique and and the fabric for the hot air baloon, she chose the rest.  That means she'll love it even more, right? I made a size six view A just like yesterday, but added even more length than before.  Like 3-4 more inches.  I wanted it her to be able to wear it without leggings for one, and also maybe get longer wear from it too. 


I actually bought enough of the hot air baloon fabric to make her a roller skate from it, but she pretty much refused it.   That's alright, the twins will look beautiful in it.  She placed the clouds and baloon where she wanted them, then instructed me where to make the rainbow.  She wanted  the traditional rainbow colors, but I guided her to these since they went with the fabrics she chose.  I kind of regret not putting a sun behind one of the clouds... maybe it would have been "too much" though- yep, that's what I will tell myself.


Then a fun yellow button in the back! It really is sewn on straight but since it is a bit big it twists when you put the loop around. 

Sunday, March 10, 2013

Spring dress.

 Did you hear?! Oliver + S released their new spring patterns last week.  As I impatiently waited for my paper patterns to arrive I had plenty of time to plan.  I immediately knew I wanted to make the Roller skate dress use some of the yummy AMH voile, I have used it for a Pierrot and an Ice cream top and absolutely loved it.  


This is a size Six with a bit of length.  I wanted this to be simple and show off the fabric, so I went with View A minus the bow.  I centered the pattern so the solid was in the middle, I like it. 


I really like the way it turned out in the back too, I was able to make the seam nearly invisible (at least I think).


I didn't have any exciting buttons, so just a simple gray one.  The pattern is absolutely wonderful, not that I would expect anything less from Liesl and co.  It has such a great shape, and it is fully lined.  Abby has requested many more of these!  ... That's right! She asked for more dresses!! I think I can fulfill that request;)


I used the tutorial on the Oliver + S website to make a stack of these cute bows. She loves them all:)


I may have gone a little overboard...


Wednesday, March 6, 2013

The Fern shirt.


Today was dress like a book character day at school today.  Abby begged me to make her a "Fern shirt", she even did extra chores yesterday to butter me up.  I made the mistake of choosing to finish the fairy tale from yesterday before starting on the shirt, which turns out was a bad idea as I ended finishing just after midnight (had wait for it to come out of the wash to get rid of those blue placket marks). 
 
 
So I used the Oliver + s jump rope pattern in size 7 just like last time, but this time I shortened it to a shirt.  I love it!


And so does she.  I used a gingham since that was the only red in my stash, I am undecided on the buttons, but I didn't want to take the extra time to cover buttons.

Are you wondering what exactly a Fern shirt is?


Apparently Fern is the character in Charlotte's web.  Ben's cousin gave Abby a bunch of books she had outgrown (sixteen year olds don't need these kind of books anymore apparently ;) ) Abby is an avid reader, in fact, she is in second grade reading at a sixth grade level (please excuse the brag). 


Of course Fern needed a red ribbon (like the book cover)


And a pig. 

She was super happy with it.  First thing in the morning she ran in my room asking if I was able to finish it, and then gave me a "Thank you SO much Mom, it's perfect!" and a giant hug.  Worth it. 

She said one other girl was Fern today, and that one other girl was the only one who knew who she was, HA!

Tuesday, March 5, 2013

A fairy tale for fun.

I have been thinking about making another Fairy tale dress for a month or so now.  I made one last fall for halloween, but it was a PITA because I was working with satin.  I *thought* this time around would be much easier.  Well, it was as far as the fabric went, but I made some really stupid mistakes.  For some reason I couldn't for the life of me figure out the invisible zipper.  I unpicked it four times... I think... I lost count.  Then I just abandoned the instructions and did my own thing and it worked the first time.  Then, I attached the skirt lining wrong so the tulle would have been touching skin.  Blah.  I didn't want to unpick all of that so Ben suggested just sewing another skirt to it.  So that's what I did. 
 
Plus, I only had half a yard of what I wanted to use for the skirt, so I had to adjust the pattern to make it less full.  I made a size 18m and added two layers of pettiskirt netting. 
 
 
One benefit of having twins?


When one baby doesn't cooperate... just walk home and grab the other!  I thought Izzy would be happy this afternoon, but she wasn't.  Too bad, because the dress actually fits her best since she is bigger.


George was more than willing to stand extra still for me.  Not willing to smile, but that's okay.  The bodice is a pale pink, I thought it would add interest to the dress (the birds are cream).


She was obsessed with the bow. 


I originally wanted to do sleeveless, but when I got frustrated trying to bind the arm holes I decided to add the sleeves.  Plus, isn't the tulip sleeve just adorable?


I love the insides.  Plus, with the two layers of pettiskirt netting and two skirt linings (oops) it helped make up for the fullness I lost when having to adjust my pattern pieces.


I was lazy and chose to utilize a decorative stitch on my machine instead of hemming by hand since this is more of a casual dress. 

Mistakes and all, I want to make another one fairly soon, I have a few things on my list first.  I love the shape of the dress and the look of it on the girls, so cute!

Monday, March 4, 2013

Sketchbook shorts.

I bought the Oliver + s Sketchbook shirt + shorts pattern last summer, but was intimidated by it at the time.  I didn't think I could do it with what little experience I had back then.  I was so silly.  These shorts are SO easy! I made a size 4 as that is what I normally make for him in the other O+s patterns, but these turned out a little tighter than planned.  (to be honest, I didn't look at the measurement chart before I cut them out).  They are fine for now, but I am almost certain they will be outgrown with in a month or two. 


I used some army green bottom weight.  He has never noticed pockets until I started making his pants, now he can't get enough of them!  He was disappointed there were no "secrets" on this pair of pants (ie, different patterned waistband lining or pocket lining). 

He is also wearing a field trip raglan, size 4, that I made a couple weeks back. He has no idea who Weezer is, but he loves his "flying W shirt" (what he calls it) and picks it everytime it comes out of the wash.


I chose not to do the exra topstitching around the pockets since I didn't have a thread that would match well.  I love those pleats!


The shorts are perfect for jumping on the little trampoline,


climbing over obstacles,


going super fast down the slide,


swinging,


And just running around the back yard in general.  He was so funny, "Mom, take a picture of me doing _______ " "Okay, now take one of ________" he was quite the director this time.  Oh boy, my back yard needs some TLC.  Guess what though? It is finally warm enough to wear shorts (anything over 60f is perfect) so that means it will be time for the grass to start growing again!  ... and that means it is time to sew faster, we'll really be needing shorts before you know it!

Thursday, February 21, 2013

The Star Wars shirt...

... that I still don't understand... Remember when I made the Yoda shirt last spring and confessed I hadn't seen the movies?  Yeah, still haven't.  And while he hated it at first, it has since become one of his favorite shirts. 
 
So anyway, I was asking Ben a few nights ago what kind of symbol or logo I should put on a shirt for Jack.   He suggested the Empire symbol or The Flash, something not everyone would know right off.  I like those kind of shirts, kind of like an inside joke:)  So I google searched for an logo image and ran across a shirt that Ben really liked and said that was the one.  A while back he was so thoughtful and brought me home some transfer paper.... and I was a little scared to use it.  Just worried that I would mess it up somehow.  Then I found a Star Wars font online and guess what? It just happened to have the symbol! So I made this in photoshop and printed it on the paper and ironed on.  Easy peasy! What was I worried about?


Alderaan shot first

So Star Wars geeks, is this funny?  Supposedly yes... ;)  The shirt and shorts are both from the Oliver and S Field Trip pattern, both size 4.  For the shorts I just left of the front and back bottom pieces, and shortened the front knee piece, skipping the darts.  They came out the perfect length!  He has never seen the movie either, but is convinced it says something about Angy Birds... oh, and it is blue so that doesn't hurt either.


I don't usually sew while the twins are awake, but they were just so happy with their Sesame Street, marshmallows, glasses and juice I was able to finish up before nap time yesterday.  (I just had to include this, aren't they adorable?!)


He loved the "secret pockets" and waistband last time, I just "had" to do it again.  Still loves it. 


And he was bummed on the last pair I didn't add the truck ribbon, so I made sure to add it this time.  Funny being he was so mad when I put it on the first time.

I have another idea I want to try with these, but wanted to test the length of the shortened pattern before I go on altering things:)


So since it was my first time trying the transfer, I didn't realize I should have trimmed really close, and even cut the logo and words seperate.  Next time!  It isn't too noticeable when he is wearing it luckily.

He was bummed  I told him I had to wash this before he wore it for the day (per factory instructions) or it might come off.


So he said "I'll make sure it doesn't come off!" and stared at it until I took the shirt off him.  Silly kid!

Monday, February 18, 2013

Yet another lace tee.

Remember my deal with Abby?  Get your room clean, and I will make you another lace t-shirt.  Well, girlfriend finally got around to it, and I had a request for a tutorial, so perfect excuse to make another.
 
 
So like last time I used Cindy's tutorial to modify the Oliver + S Hopscotch top, this time in size 6 with extra length, remembering to raise the neckline this time so it wouldn't be too wide.   I sewed all the pieces together, treating the lace and front bodice as one piece.  I didn't hem the sleeves, length or neck lines yet since polyester thread wont take the dye.  Basically I went as far as I could before the stitches would show. 


So this is the part where I like to look up the Rit dye formulation chart to see if I can find a color I like, and have the right dyes for.  (I have a few too many bottles... though never the ones I really want... hm...)


I chose my color then ran my tap until it was as hot as it would go and added it to a dedicated non-food container. 

I am just gonna say it now, I don't follow rules or directions well so you might want to look somewhere else if you need exact measurements. 

So, I added a good amount of salt (heard it helps the process) with some Scarlet and a little more Wine than Scarlet. The more water you add, the more dye you will need.  Also, the more dye you add the darker it will be- at least in my experience.  (The Rit site has exact measurements). Stir well.  Then add your shirt.  Make sure it is fully immersed in the water. 


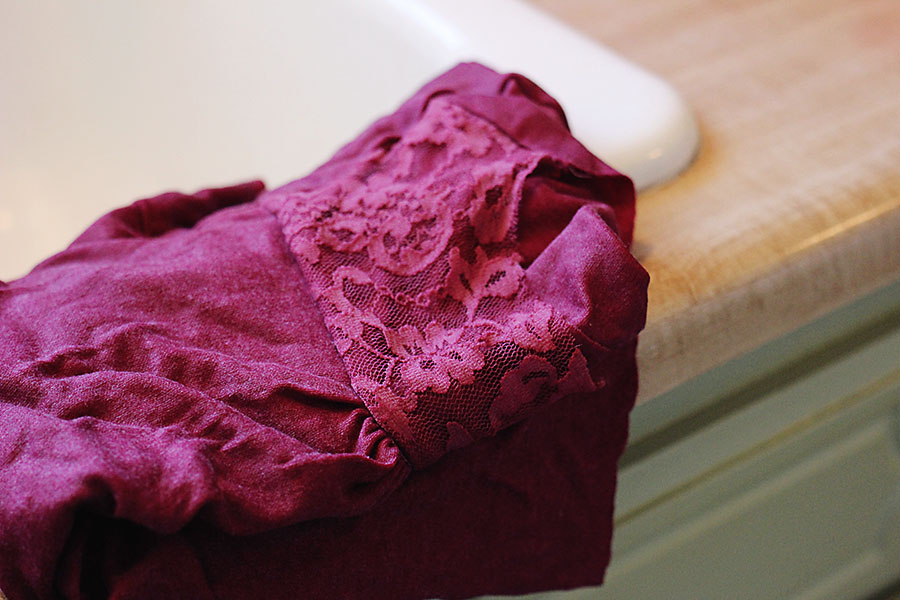
This is what it looked like immediately.


This was 45 minutes later.  Not a whole lot darker this time, the last three times it did make a huge difference leaving it in longer. 

I like to stir the tub every 3-5 minutes, though I have read you should constantly stir.  You can leave it in as long as the water is  hot.


Aaaand rubber gloves are a good idea, though I never use them.  It will dye your hands for about a day, but no biggie.  Be very careful on your work surface, you may want to cover it, and careful when you pour out your dyed water. 

Run the shirt under warm water gradually making it colder until the water runs clear.  Again, I am a rebel and run it until it is mostly clear, still a little color there sometimes (after ten minutes of rinsing, I was just done).  Then put it in the washing machine, your cycle should be a warm wash then cold rinse. 

(You will want to wash seperately for the first 3-4 times so as not to dye your other clothes!)


Different materials take the dye differently.  This shirt and onesie were in the same tub at the same time.  They were both cotton, but  I am not sure what the lace was- the bolt only had the name of the company. 


Yep, I am officially obsessed.  It started with the blue tee then the tees for the twins and now this!  I am sure there are worse things to be stuck on...

So wash, dry and hem your shirt.  The neck is just turned under and stitched down.  I have usually had the right thread color, but not this time, so I used gray for a fun contrast.


So you get this!  Not too bad for an afternoon, right?


And little missy just loves it.  She left it on until bath time, then put it back on for bed so she would remember to wear it in the morning for school:)