Friday, July 26, 2013

Abby's Ayashe.

Miss Abby starts third grade in less than a month.  What does that mean? Time for new school clothes, of course!   Ben has been working out of town this week, so I have been able to get extra sewing time in, and it seems to be the week of the Ayashe for me!  So instead of chilling on the couch after the kids went to bed, and instead of going to bed at a decent hour, I decided to blast quietly listen to The Killers and get my sew on. 


I made a size 8/9 as that is what she measured in.  I had planned to do the elastic in the hem of the sleeves and a tie at the shirt hem, but it came out too short.  Sigh, she may not get as much wear as I had hoped out of this, hopefully it will last until fall.  I wonder if I should shorten the sleeves some?  They seem to hit at an awkward spot. 


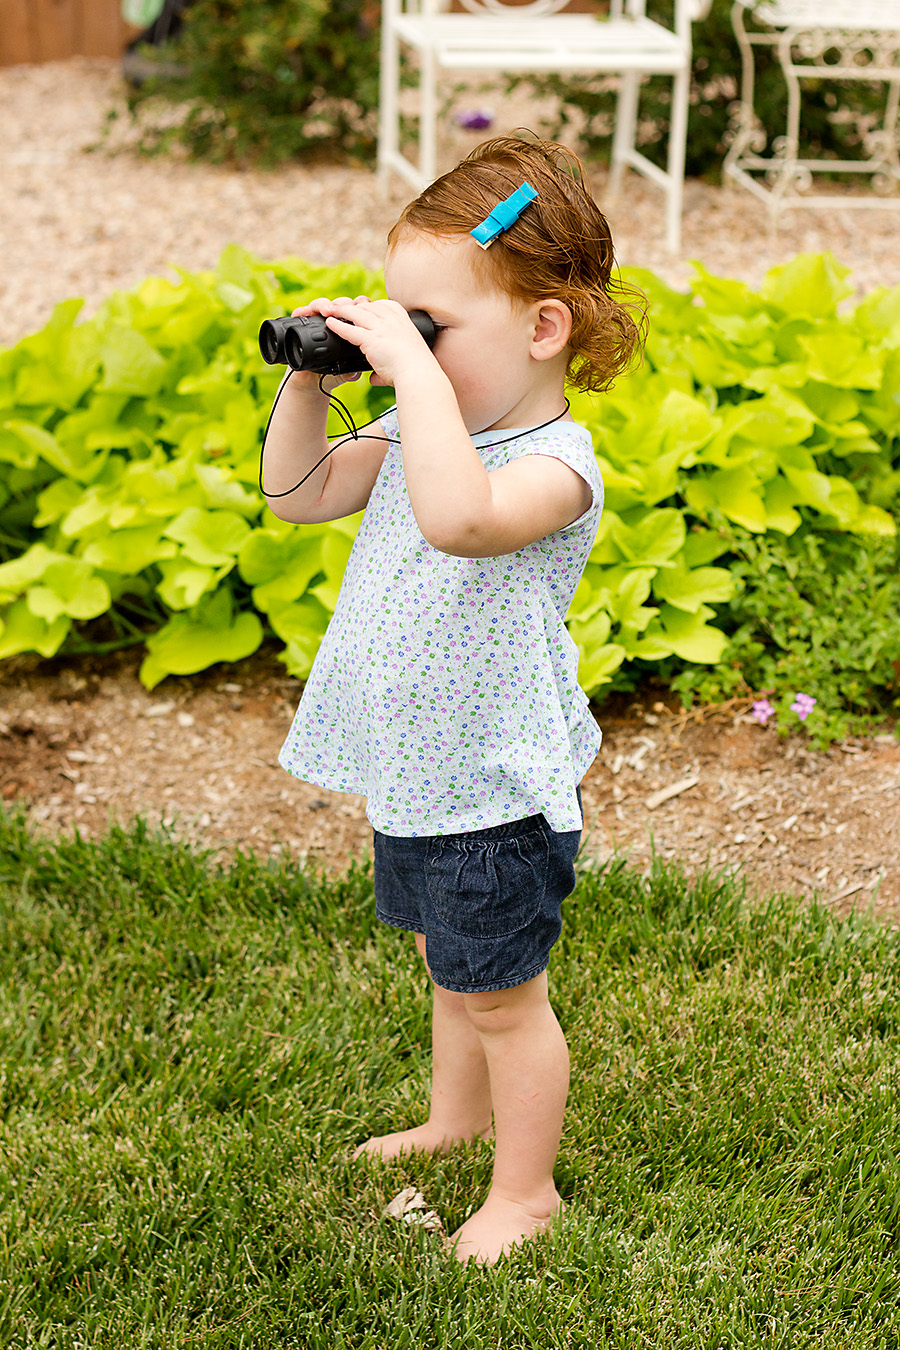
I picked up this Lisette lawn on closeout.  Score!  It is so soft and airy, she loves it.

So after being disappointed at the length, I decided to make another and add some length, then I decided why not make it a tunic?


I lengthened the 8/9 by 9 inches, slightly flaring the top out starting just under the arm and curving the hem a little.


I also pleated the places that were instructed to be gathered.  I thought it gave it kind of a fun, different look.  Also, rather than turning the sleeves under and hemming, I turned them to the outside and added some neon pink piping left over from the faux romper.  You might have noticed the front looks slightly different too, I loved Nicole's laced Ayashe and shamelessly copied complimented her idea (and Sarvi's ) though I only stitched the piping, not the extra decorative stitches.  I also added some width to the sleeve and pleated in the center like this one. 

I am not done stealing complimenting Nicole's designs, I have the skirt cut to go with the long sleeved blouse that was completely inspired by her again.  I just love my sewing pals and the amazing inspiration they provide!

Thursday, July 25, 2013

Ayashe skirt.

Thinking back on my sewing, I rarely make the two pieces that are meant to go together as a set (at least, the patterns that have two pieces).  It was time to remedy that!  So after I finished the Ayashe blouse I decided to go with the cute little pleated skirt.  


I used some gray denim and black buttons that were a pain to sew on, and yes, they didn't end up perfectly spaced... I need to go back and fix that, but the outfit was so cute I just wanted her to wear it today;) And very rarely will she change her clothes mid day, what ever she starts with she ends with- unless it gets wet, then she will change.  Funny girl.


Yep, the shot cotton is really hard to get a true shot of.  It isn't quite this bright in real life. 

Like the blouse, I made a 2/3.  She measures in to the18m, but this way we can get extra wear due to the way they have you do the adjustable waist (no buttonhole elastic).  George doesn't even measure in to the skirt!  In fact, today, she is wearing her 6m sailboat pants- what?!  Totally works for me though, they have now been in rotation for 18 months!


I lined the pockets with a scrap of the shot cotton, don't you just love hidden details? 

Abby has begged for politely requested a skirt like this, and I have some Lisette lawn set aside for a top, I just can't decide between long sleeve and short.  We wont need a jacket here until October, and even then we can get away with a cardigan until December, then by February we are back to cardis.  Sounds nice, eh?  It is, aside from the 110f + in the summer... 

Wednesday, July 24, 2013

Ayashe blouse.

 
After making a crap load of skirts I wanted to make something "for me" before I moved on to my next project- custom order Disneyland outfits.  Eight pieces to be exact.  So, I chose the Figgy's Ayashe.  I have made this blouse once before and it gave me fits, but then Nicole did a super amazing, awesome sauce yoke tutorial and it was a piece of cake this time.  Well, aside from the collar edges, but I always struggle with those. 


I made a size 2/3 based on her measurements, it is a little big, but she just barely measured in to that size- which is maybe why it is so low in the front?  When I made Abby's I had to pop a few stitches in the front to get it over her head, but this one is as the pattern suggests. 

I used a yummy, soft but hard to photograph shot cotton and topstitched with gray thread.  I also went with the drawstring hem this time. 


I paired it with her Ottobre leggings (they have cute little bows at the ankle, but she didn't hold still long enough to catch them).  My choice was heavily influenced by Missy M's styling. 


I don't know what happened, perhaps I didn't properly read my lines, but I ended up with quite a bit of extra fabric while setting in the sleeves.  Rather than trying to recut my pieces I just did a little pleat.  The yoke lining and collar lining are both gray, I love the hint of it you catch as she moves. 

Next, I think I will make the Ayashe skirt in a gray denim then move on with my "must sew" list.   

Tuesday, July 23, 2013

Skirts.


Nothing super exciting going on here.  Just 9 maxi skirts, all stacked up nicely and ready to head to their new owners.
 
They aren't a big deal, really fast and simple, but by the end I was ready to be done.  I am pretty sure I could never work in a sweat shop.


All fabrics from girlcharlee.  The three on top are knee length, the bottom one is mine, the rest go to family/friends. If you are interested, this is what they look like hanging up.
 
I don't want to make another maxi for a while now... too bad because I have 2 more set aside for me, but I need something different to work on first... 


Saturday, July 20, 2013

Swing dress.

 Back again with some more swing tops, though this time they are dresses.  I used the same tutorial as the other ones (here and here), and being the twins now had FOUR of the same top, I thought maybe it was time for a dress (or two).  I also made the same changes as before to the provided 2T pattern, added a bit more room in the chest and lengthened the sleeves a little. 


Sorry about the lack of ironing going on in these two wall shots.  Bad, I know. 

I used some girlcharlee knit I picked up ages ago and added a gold sparkle heart.  I apologize for not giving the source of the idea for the heart, I know I saw it somewhere, I just can't remember if it was on a blog or on a RTW site. 

I used some Martha Stewart paint I found at Jo-Ann, it said it worked on all kinds of surfaces including fabric.  It worked out alright, but a little came off with the first wash- I don't know if it was maybe something I somehow did?  I need to touch it up and wash again to see if maybe it is just the paint.  The second one I made (you'll see it later) I used a different paint and didn't have any problems after washing. 


I love the drape of it.  Still.  ( I realize I have said it a lot about these tops)


George seemed to like it's movements too.  She was jumping up and down and spinning around. 


Being I was lazy and just turned the neckline under instead of adding ribbing, it is a little wide on my narrow shouldered child.  Meh, it is extra long, so she will get plenty of wear out of it, and eventually grow in to it.

I was thinking, how cute would it be with tights, boots and a cardigan in the fall??


I used a neon pink paint with this one, but added some Martha Stewart purple sparkles.  I first just did the sparkle paint like the stripey shirt, but it didn't have a purple base like the gold base (if that makes any sense?) it was just see through sparkles, so I added the pink.  This one looks kind od like a night gown to me... which works out great because apparently I didn't get all of the crayon out of the dryer and now this one has black marks on the back and right in the front (thank you photoshop for your assistance in removing them for the pictures, haha).

That is probably all I will get in for Kids Clothes Week, I tend not to sew on Sunday, plus I still have a maxi skirt or two (adult) to finish, a reading pillow pattern I am testing, and have been commissioned to make three outfits each for a friend's two daughters to go to Disneyland in a month or so. 

Thursday, July 18, 2013

Raglans.

Today.  Today I went with one of my most used patterns, the Field Trip Raglan.  These were a combination of the dryer incident and realizing this little guy starts kindergarten in, oh, a month.  He was running a little low on t-shirts, and is always so excited when I make things for him, so this was a no-brainer. 


If you have read my blog before, you probably heard that he is obsessed with Angry Birds.  Well, sharks are a close second.  He LOVES to read about sharks and watch documentaries on them.  So, I made him this tee in super soft jersey from girlcharlee and added a shark silhouette using a freezer paper stencil, acrylic paint and a fabric medium. 

Don't let this picture fool you, he was SO excited.  This was just his face when I showed up at Grandma's and told him I wanted a picture of his shirt.  Not too happy to stop playing for, I don't know, three minutes? 

I can see now that I really should have moved the stencil up a bit.  Too late for that.  I really wanted to do one diagonally or semi angled near the chest and one that wrapped around the side (head on the front of the shirt, tail in the back) but he refused my brilliant idea.  He is getting quite opinionated as far as his clothing goes.  In fact, he refuses to wear his Tom and Jerry shirt I made because the graphic isn't front and center. 


Ah, the anchor shirt.  He was sitting next to me one night as I was searching the girlcharlee site and begged for this fabric.  He wanted me to make him a shirt from it that night. heehee.  I was a little slower than he would have liked, but he was super excited when he saw me cutting it this morning.   And, so, the sleeves look off in the picture, but I promise in real life they are the same length!

The big kids are off this weekend on an adventure with Grandpa and Grandma, so maybe I will get a few more items in this week during naptime.  Their closets could use it (remember the aforementioned dryer incident?). 

Wednesday, July 17, 2013

Sweetheart halter.

So, I really wanted to love this project, I really did.   But I struggled.  I thought the instructions were somewhat lacking, and was annoyed that there were no pattern pieces, only dimensions.  Yes, all the pieces were rectangles, but then I end up wasting time making my own pattern pieces rather than wasting a bit of ink.  Is that just me? Maybe I am in the minority on that one...


But honestly, I do love the result.  Aaaand, I have two more cut out for the twins so I shall just have to get past my annoyance. 

It is the Sweetheart Halter by peekaboo patterns.  I have made a few of her patterns before (here, here, and here) without problems, but for some reason this was taking me way longer to figure out than it really should have.

For the bodice the instructions say to cinch up the top and tuck all the pieces to hide seam allowances (not the exact words, but pretty much sums it up), not pleased with the result.  Maybe sewing a little elastic under the contrast piece will give it a better gather?  I don't know!  But like I said, I have two more already cut so I better figure something out.


Also, I chose to follow the Oliver + S method for attaching the bias ties.


I do like the back.  I left the ties a few inches longer as I had extra length when making the bias ties. 


And did you notice?  Little Missy "finally!" got her ears pierced.  Daddy told her when she turned eight she could, and well, she turned eight on the fourth.  She was so excited, and so brave.  Though I really should have thought it through, she is going to the lake this weekend with Grandma and Grandpa... Probably should have waited until next week so it would be less likely to get infected, but the stars aligned and the twins woke up late and were happy this morning so we went to the mall! 

Tuesday, July 16, 2013

Same day, more swing tops.

Since the first swing top was made before naptime this morning, I decided to make a few more during their actual nap while Abby and Jack entertained themselves by building a mud city.


So, same as earlier, I used the mad mim tutorial / printable 2T pattern, but this time I added a little more room to the chest and a little more length to the sleeves so it would be easier to turn them under. 

The blue flowers and stripes are from girl charlee, the pink hearts are from Jo-Ann.


The faces Georgia pull just crack me up.  She is a hoot.  She still easily fits in these puppet show shorts - they are 6month!  Aaah, she is a skinny minnie. 


Elizabeth was obsessed with her binoculars and completely uninterested in posing for any kind of picture, which is par for the course.  Also she is wearing another pair of puppet show shorts from last year.


This yellow stripe is a scrap from my SIL's maxi skirts, I knew that piece was big enough for something! ;)


When they aren't fighting like crazy, or screaming their lungs out, these two can be pretty cute. 


Life with twins can be hard, but moments like these make it all worth it.

Swing top.

I wasn't really planning on sewing kids clothes this week.  Gasp! I know!  Then this morning I found a melted crayon all over an entire load of the kids clothing that had just come out of the dryer... Sigh...  I did find a post on the net about how supposedly you can get it out using dish soap, laundry soap and vinegar- so far no good.  It also said sometimes it takes a few runs through the wash first, I am not holding out much hope.  The ironic thing?  I actually was planning Abby and Jack's school wardrobe this morning (school starts in 4 weeks).  Oh well, that's life, right?  


So I had seen a tutorial from Mad mim for a swing tee with a 2T printable.  Score, Elizabeth is currently that size RTW.  It is a really cute top (IMO), the shape is great, and there are minimal seams due to the way she has you cut your fabric.  The whole top was like, 30 minutes, from printer to baby.


Can you believe this super cute dotty knit is from Walmart?!! Me neither.  I happened to walk past their fabric one afternoon (don't do that very often) and saw this knit that I had literally just seen the week before in my local shop.  It is a David Textile print, I have seen them popping up at my local quilt store as well as Jo-Anns.  It was on clearance for $3 as well as some teal and hot pink ribbing (that I of course also picked up). 

So the top is a little tight on Elizabeth, which I should have been able to see that it would be, but never fear for it fits Georgia just fine.  The next one (yes, there will be a next one... probably this afternoon;)  I will add a little room to the chest, maybe a little length on the sleeves?  I was also considering a hi-low hem.  And the neckline, sigh.  It gapes.  I'll have to try and fix that too (my fault, not the pattern).  Also,  I will have to get a better shot of the top, maybe hanging, because like I said the shape is so cute. 

And those shorts?  Yeah, she barely fits them now! Probably time to add some more of them to the list too!

Friday, July 12, 2013

A hopscotch knock off, dolly style.

Abby has been having so much fun playing with her new doll clothes, I searched pinterest for some inspiration and ran across this gem. Doesn't it remind you of the hopscotch skirt by Oliver + S?? My mind immediately began spinning, and I came up with what I think is a pretty close rendition- in dolly size of course.


Cute, eh?  This is actually my second one, the first I wasn't quite satisfied with (I'll get to that later).  I modified the Liberty Jane free shirt by eyeballing my big kid size pieces.  Not completely satisfied with it, it's quite baggy and the front didn't end up having enough to gather like the real one.  (it is folded up in the picture to show the skirt better)


This was my original try.  The pockets ended up a little too narrow, and I pretty much just hated this material, it is a cotton I picked up to try out- glad  I didn't use it for a kids garment, it has a weird feel, and that is what I was worried about. 


Okay, back to the better one (in my opinion).  Do you want to make one of your own??  Yay!  I'll assume you have the Oliver and S pattern then and give the measurement and pattern piece numbers.  Sorry, I didn't take the time to do a tutorial, this was a quick break in between 10 (yes 10!!) maxi skirts that I am working on.  No, not all for me... Sadly... ;)  they are very comfy!

Piece 1:  front skirt, width 5", length 6"- cut 2
Piece 2: back skirt, width 10", length 71/2"- cut 1
Piece 3: front placket, width 2", length 6"- cut 2
Piece 4: front waistband, width 2", length 7"- cut 2

I skipped the pockets the second time around because I was in a hurry.  For the first one, I again just eyeballed the shape of the pattern piece and played around folding the paper until I *thought* I had what I wanted.  One of these days I will try again. 

I used a 1/4" seam allowance, and pretty much folded my pieces over with what "felt right".  Sorry, not very scientific, some spots (like the front waistband raw edges, placket raw edges) I folded over 1/4".  The placket top I think was closer to 1/2", again, what ever made it look "right".  Oh, and this is a 18" doll, in case you couldn't tell:)  If anything wasn't clear, which  I wouldn't be surprised, I will gladly answer in the comment section! 

Wednesday, July 10, 2013

A day of dolls.

I recently made some doll clothes and hair bands for Abby's 18" doll, and she and her cousin Beth spent the afternoon dressing, posing and taking pictures of the dolls.  (okay, I took the pictures, but the girls chose where to place them and what angles to take them from)
 

All the outfits were made from scraps left over from other projects or fat quarters, love that! 

The tops are the free popover sundress, dolly sized, from Oliver + S and the bottoms are Liberty Jane Skinny jeans

The headbands are just felt circles sewn together with a button, then hot glued to 1/4" elastic.


I decided to add a little flair with some pom pom trim.  These pants are the same pattern just shortened some.

You might be wondering what this yellow thing she is standing on in our back yard is... it is what I like to call the puke machine.  It is a Ben made merry-go-round, and yes, it has made kids puke (none of my kids, though).  It goes so fast!  But the kids love it, especially the twins.


Some lace on this one, and a cool idea we saw online (sorry, can't remember the source!) to use a scrapbooking brad as a ring. 


A little flair on the back of the jeans never hurt anyone.  I struggled with the topstitching on these because the pieces were so tiny!


I scored this bookshelf a while back at a garage sale for $10, she was originally asking $50 but I went back late in the afternoon and she just wanted it gone!  So my awesome MIL haggled for me:)  The kids had tons of fun making decorations and using my "special tape" aka washi tape. 


These cool chandeliers are a free printable from here.  We used cardstock instead of cardboard, but we probably should have used the light cardboard as suggested.  Oh well. One is covered in red glitter and one is colored by Abby and Jack.


Jack drew all the kids in photo frames, while Abby drew the Declaration of Independence, ha!  She cracks me up.  


All in all, a fun, creative day with the kids!  And, um, doll clothes are kind of addictive! 

Thursday, July 4, 2013

A romper... sort of...

I love, love rompers on little girls, but let's be honest, while still wearing diapers they are a bit of a pain!  I have seen the faux romper popping up around the web recently and knew that would be my solution. The twins each have a romper from Target and I absolutely hate how their diapers hang out the bottom if the are at all wet.  Plus, this way I could have two stand alone pieces too.   


I used a chambray with neon piping that I found the other day at my local store, total score because I had actually been looking on etsy for some (piping) the day before.  They also had yellow and orange, I may have to go back:)

I used the Oliver + S popover sundress shortened to a top with an added elastic casing at the hem line, size 2.  The shorts are Elegance and Elephants bubble pocket shorts size 18m/2t. 

My only complaint with the shorts pattern is that the main shorts have a curved waist but she has you draft a rectangle for the waistband facing.  I was too lazy this time, but next time I will draft a curved piece instead.  Also, not a big fan of having to draft my own pieces in general, (especially when spending a decent amount on a pattern) and you have to do the waistband, pocket and leg cuffs. 


Pretty cute result, right?  Elizabeth wore it yesterday and I think I need to add a little elastic to the top hem, she has a bigger belly than Georgia:)


She seems to like it!